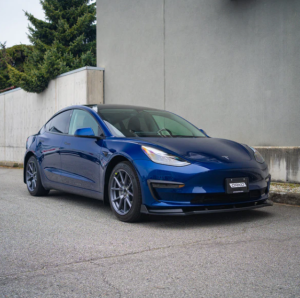
Change that rounded-off front bumper and give your Tesla Model 3 the sportier front end that it deserves! Manufactured using durable and flexible ABS, the Model 3 three piece sport front lip is easy to install, fits like a glove, and will withstand the test of time when treated right.
Available Finishes: Gloss Black and Matte Black
Features:
DURABLE + PRECISE FIT - Fits the 2017-2023 Tesla Model 3 perfectly. Manufactured using high-quality thermoformed ABS plastic.
QUALITY FINISH - 3 layers of UV protective matte clear coat.
What's Included:
- 3 piece thermoformed ABS splitter
- Double sided, autobody grade adhesive
- Phillips screws + washers
- Adhesion promoter
Installation:
Step 1: Lay out pieces onto a soft surface upside down
Step 2: Insert corresponding pieces together
Step 3: Working on one side at a time, have a friend hold both pieces together so that there's no gap in between the panels
Step 4: While the extension is being held, screw the pieces together using the provided smaller silver screws
Step 5: Repeat with the other side of the lip
Step 6: Flip the assembly over and wipe down the adhesive application areas with isopropyl alcohol or any degreaser
Step 7: Apply provided adhesion promoter to contact areas>
Step 8: Apply provided double sided tape to the contact surfaces (cut to size)
Step 9: Test fit lip onto vehicle
Step 10: For easier installation, jack up the vehicle to allow for more room
Step 11: Peel back the adhesive backing halfway
Step 12: Raise the lip to the vehicle, apply pressure to the exposed double sided tape
Step 13: Peel back the rest of the tape and apply pressure
Step 14: Using the provided pre-drilled holes, screw in the rest of the hardware with washers applied (black screws)
Step 15: Repeat with the other side
Step 16: Wipe down newly installed parts with a quick detail solution or wash the vehicle


-thumb.jpg "01 (1).jpg")