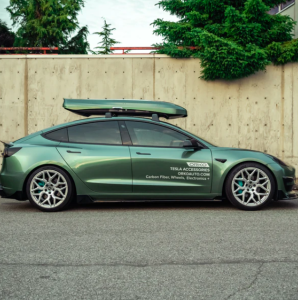
Level up your Tesla Model 3 with Orko sport side skirt extensions and take its style to the next level. Crafted from high-quality Fiber Reinforced Plastic (FRP), these sleek upgrades add a splash of style and improves aerodynamics. Easy to install and designed specifically for your Model 3, our FRP side skirts will make heads turn as you hit the road. Embrace the sporty vibe and improve your Tesla's aesthetics.
Available Finish: Gloss black or matte black.
Features:
DURABLE + PRECISE FIT - Fits the 2017-2023 Tesla Model 3 perfectly. Manufactured using high-quality/durable FRP.
QUALITY FINISH - 3 layers of UV protective high gloss clear coat on the gloss finish.
INCLUDED WARRANTY - 1 year manufacturer warranty.
What's Included
- 4 pieces x side skirt extensions
- Double sided, autobody grade adhesive
- Phillips screws + washers
- Adhesion promoter
Installation
Step 1: Lay out pieces onto a soft surface upside down
Step 2: Insert corresponding pieces together
Step 3: Working on one side at a time, have a friend hold both pieces together so that there's no gap in between the panels
Step 4: While the extension is being held, screw the pieces together using the provided smaller gold screws
Step 5: Repeat with the other side skirt
Step 6: Wipe down the adhesive application areas with isopropyl alcohol or any degreaser
Step 7: Apply provided adhesion promoter to contact areas>
Step 8: Test fit side skirt extensions on the vehicle
Step 9: Jack up vehicle to gain clearance
Step 10: Peel adhesive backing
Step 11: Raise the extension to the vehicle, apply pressure to the exposed double sided tape
Step 12: Raise the extension to the vehicle, apply pressure to the exposed double sided tape
Step 13: Using the provided pre-drilled holes, screw in the rest of the hardware with washers applied (black screws)
Step 14: Repeat with the other side
Step 15: Wipe down newly installed parts with a quick detail solution or wash the vehicle


-thumb.jpg "01 (1).jpg")